Tuesday, July 31, 2012

Just Because It Looks Good Doesn't Mean It Tastes Good

Pasta with Minted Pea sauce...when I saw this recipe online, I was intrigued. It sounded very fresh, summery, and vaguely British. I imagined a zesty, slightly sweet, quite savory dish with deep, complex flavors and a velvety texture. What I got was a very minty, very pea-y, very thick-tasting, and thus very unappetizing dinner that not only disappointed me, but my parents as well, leaving us yearning for dessert (leftover strawberry-rhubarb pie) to get the taste out of our mouths.

Looks pretty. Tastes not so pretty.

Now, I love to cook and I love to try recipes from all over. New ingredients and unique combinations of flavors and textures intrigue me and I'm fortunate enough to have parents who are willing to try out just about anything I make, even if it's a bit unusual. But, just because a recipe or ingredient sounds unique and daring and delicious doesn't mean the end result will turn out that way. I'd say that a majority of my recipes, whether created from scratch or adapted from those of others, turned out just as I expected, or better. Now, there were one or two spectacular failures along the way, like the anchovy-laced pasta dish I mentioned in this post about listening to your gut in the kitchen, but mostly, the recipes I tried out worked out just fine. Despite the successes, you've gotta be prepared for a few "A for effort" dishes along the way, and not be surprised when a dish you think sounds amazing is less than amazing when it's actually on a plate in front of you. It's all part of learning to cook and honing that skill, and while it totally sucks serving a less-than-stellar dinner, you just cross that recipe off your list and move onto the next thing (or, if you're me, you make sure the next thing you make is one of your tried-and-true recipes and hope that everyone forgets the abomination from the night before). So, for those cooks out there brooding over a bad dish, chin up and try, try again!

Saturday, July 14, 2012

Recipe: Fluffy, Flaky Buttermilk Biscuits

A little while ago, I made these delicious peach cupcakes and used buttermilk as part of the cake recipe. That carton of buttermilk has been hanging out in the fridge since then, just begging me to figure out what else I can use it in. Well, I don't know about you, but when I hear "buttermilk" I immediately think about buttermilk pancakes and buttermilk biscuits. I've got a pancake recipe that I love, but I've yet to try biscuits, so that's what I made this afternoon, working off of Alton Brown's recipe.


Yields: 12 (one dozen)
Prep. time: 10 minutes
Baking time: 15-20 minutes
Difficulty: Easy

Ingredients

  • 2 cups all-purpose flour
  • 3/4 tsp. salt
  • 4 tsp. baking powder
  • 1/4 tsp. baking soda
  • 2 tbsp. shortening (I used Crisco), chilled and cut into a few chunks
  • 2 tbsp. butter (unsalted or salted), chilled and cut into a few chunks
  • 1 cup buttermilk, chilled

Directions
Preheat the oven to 450*F. In a large bowl, stir together the flour, salt, baking powder, and baking soda. Add the chunks of butter and shortening. Using either your hands or a dough/pastry blender (I recommend using the latter because it offers more consistency and you'll create less heat than if using your hands), rub/cut the butter and shortening into the dry ingredients until the mixture looks crumb-like and the pieces of butter and shortening are pea-sized or smaller (do this quickly, as you do not want to let the butter and shortening melt at all). Make a well in the middle of the mixture, pour in the buttermilk, and stir until the mixture is just combined. Place the dough on a floured surface, put a little flour on the dough and on your hands, and gently knead the dough/fold it over on itself 5-7 times (don't work it too much because it will make the dough tough). Press the dough ball into a 1-inch thick round and use a 2-inch biscuit cutter to cut out the biscuits, being sure to press straight down into the dough as you cut. Take the scraps and form them into another 1-inch thick round and cut out remaining biscuits (work these pieces as little as possible, because, as I said, the more you mess with them, the tougher the finished biscuits will be). Place the biscuits on an ungreased baking sheet and bake until they are tall and lightly golden-brown on top (about 15 minutes). 


Whether you spread jam on them, drizzle them with honey, or smother them with sausage gravy, these biscuits are sure to please. Buttery, fluffy, and flaky, they're perfect for breakfast or a light snack (especially when they're hot out of the oven).

Thursday, July 12, 2012

Recipe: Pasta and Chicken with Sun-dried Tomatoes and Artichoke Hearts

A long day working in the basement, organizing ungodly amounts of Christmas ornaments and assorted knickknacks, left me looking for something lovely and light for dinner last night—something that could be enjoyed on the back porch with a glass of wine and a few hungry cats. Enter lemony artichoke hearts, tangy sun-dried tomatoes, and tender chicken, tossed with pasta and a light butter and olive oil sauce. 


Serves: 4
Prep. time: 10-15 minutes
Cooking time: 15 minutes
Difficulty: Easy

Ingredients
  • Olive oil, enough to lightly coat the bottom of medium pan
  • 2-3 tbsp. butter
  • 2 chicken breasts, cut into 1-2 inch cubes
  • 1, 7 oz. jar of sun-dried tomatoes packed in oil (I used Alessi brand), drained (reserve the oil in the jar or in a small bowl) and diced
  • 1, 14 oz. can artichoke hearts, drained and quartered (cut each into four pieces)
  • 2-4 cloves garlic, minced
  • 1-3 tbsp. dried Italian seasoning
  • Salt and pepper, to taste (I used a rainbow peppercorn blend, which packs some great flavor!)
  • 8 oz. spaghetti, angel hair, or linguine (for a different style, use a small/short pasta, like farfalle or penne)
  • Italian cheese, as desired

Directions
Season the chicken with salt and pepper (garlic powder is also a good addition). Heat a little regular olive oil, olive oil from the sun-dried tomato jar, and butter in a medium pan over medium-high heat, then add the chicken. Cook until the chicken is a little more than halfway cooked through. Add the artichoke hearts and cook for another 1-2 minutes, then add the sun-dried tomatoes, garlic, and a little more sun-dried tomato olive oil from the jar. Reduce the heat to medium and continue to cook, stirring the mixture occasionally. Season with salt, pepper, and Italian seasoning. While the mixture is cooking, bring a large pot of water to a boil. Add the pasta and cook according to the packaging (about 4-5 minutes for long, thin pastas). Drain the pasta, then add a little butter and a splash of sun-dried tomato olive oil to it—toss to combine. Add the chicken, artichoke, and sun-dried tomato mixture to the pasta and toss to combine. Serve topped with Italian seasoning and/or Italian cheese, as desired.

This dish offers light, bright flavors that make it perfect as a summertime dinner. Artichoke hearts have a slightly lemony taste that blends well with the tangy, sweet flavor of the sun-dried tomatoes. A "sauce" of butter and olive oil is all you need to pull the dish together, and a sprinkling of Italian cheese is a perfect way to top it off.

Friday, July 6, 2012

Recipe: Hoisin Burgers with Chili Garlic Mayo and Grilled Scallions

My brother dropped by the other night to have dinner and help me finally get my Wii connected to our wireless Internet (I had to move my Wii from my bedroom to the basement and there's a crazy button combo I have to press to turn it and the TV on, but I've got better seating now and access to Netflix, so it's all good). Anywho, we decided burgers (adapted from a recipe in a recent Food Network magazine) and onion rings would be a good choice. The onion rings were a bit of a failure, due to my inability to multitask (can't talk, watch TV, and pay attention to the deep fryer at the same time), but the burgers were tasty (especially the chili garlic sauce-mayo!) and I'm sharing the recipe for them in this post.


Serves: 4-6 (depending on how large you make your burger patties)
Prep. time: 10 minutes
Cooking time: 10 minutes
Difficulty: Easy

Ingredients
  • 1 - 1&1/2 lb. 90-93% lean ground beef
  • Salt and pepper
  • 1 bunch scallions/green onions, roots and green part removed
  • 1 tbsp. sesame oil
  • Hoisin sauce (see my recipe here)
  • Approx. 1/2 cup mayonnaise
  • 1 tbsp. chili garlic sauce (this can be found in the Asian section at your grocery store; use more if you want it spicier, less if you want it less spicy)
  • Hamburger buns
  • 1 cucumber, thinly sliced (use a vegetable peeler or mandolin to cut thin slices

Directions
Preheat the grill. Season the beef with salt and pepper, along with a splash of soy sauce or a few tablespoons of the hoisin sauce, and form into 4-6 patties (remember to press your thumb into the middle of each burger to create an indentation to help them cook properly). Toss the pieces of scallion in sesame oil and then seal them up in a foil packet. Place the scallion packet and burgers on the grill over medium to medium-high heat. Brush the burgers with the hoisin sauce repeatedly as they cook, being sure both sides get evenly coated. Cook until the scallions are tender (5-10 minutes) and the burgers are cooked to the desired doneness (about 3-5 minutes per side for medium doneness). While the burgers and scallions are cooking, whisk together the mayo and chili garlic sauce in a small bowl until thoroughly blended. Spread the chili garlic mayo on the inside of the buns, then place cucumber slices on the bottom, beef patty on top, and top the patties with the grilled scallions.

These burgers are tasty, with Asian-inspired flavor and delicious toppings. The chili garlic sauce-mayo has the kind of heat that sneaks up on you and offers a kick to the rest of the dish, while crunchy slices of cucumber help cool it down. Onion-y scallions go perfectly with the salty, meaty, peanut-y taste of the burgers.

Thursday, July 5, 2012

Recipe: Fresh Peach Cupcakes with Peach Cream Cheese Frosting

My kitchen smells like fresh-picked peaches and it's absolutely heavenly! I ran across this recipe for peach cupcakes while browsing through posts on 
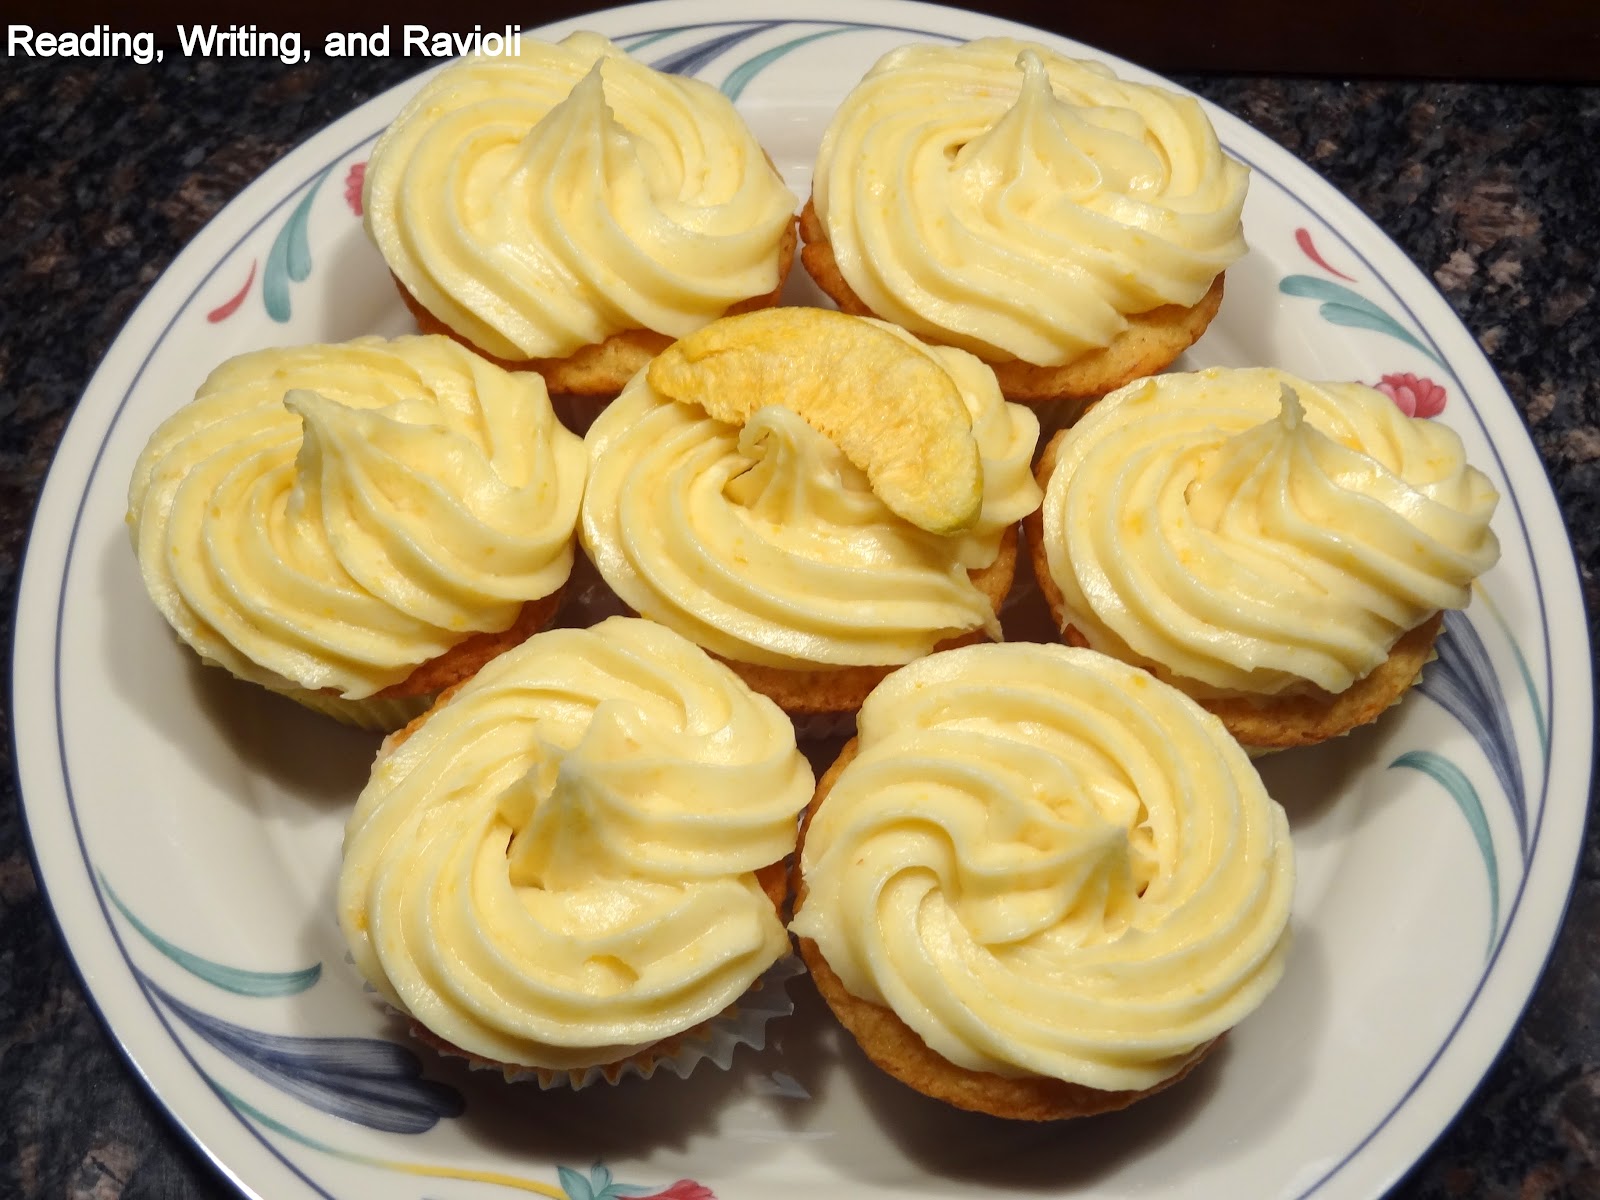
TasteSpotting and, as a peach lover and a wannabe baker, I knew I had to make them. I made up a half batch (I've posted the full recipe though), seeing as I'm on my own this week, and I'm hoping I can resist their delicately sweet call, beckoning to me from the fridge. These cupcakes are light, with a sweet peach flavor that's very present without being overpowering. The cream cheese frosting also incorporates the sweetness of the peach, but with the creaminess of butter and the tangy flavor of cream cheese. Perfect for a summer brunch or dinner party and such a pretty, pale peachy-pink color!


Yields: 24 cupcakes
Prep time: 10-15 minutes
Baking time: 21-24 minutes
Difficulty: Easy
Equipment: Electric mixer

Ingredients
For the cakes

  • 2 & 2/3 cups all-purpose flour
  • 2 & 1/2 tsp. baking powder
  • 1/2 tsp. salt
  • 3/4 cup low-fat buttermilk
  • 1/2 cup pureed fresh peaches (cut slices off of the peach, being sure not to include the pit; skin on is okay)
  • 1 tsp. pure vanilla extract
  • 2 sticks (1 cup) unsalted butter, softened
  • 2 cups granulated sugar
  • 3 eggs (large)
  • 1.75 oz freeze-dried peaches, pulverized (use food processor or place in Ziploc bag and crush with mallet; Target's Archer Farms brand sells 1.75 oz. bags of freeze dried peaches, which is perfect)


For the frosting

  • 2 sticks (1 cup) butter (salted or unsalted)
  • 8 oz. cream cheese, softened
  • 1 tsp. pure vanilla extract
  • 1.75 oz. freeze-dried peaches, pulverized
  • 3-5 cups of powdered sugar (confectioners sugar)

Directions
For the cakes
Preheat the oven to 350*F. Line cupcake tins with liners.In a medium bowl, mix the flour, baking powder, and salt together and set aside. In a small bowl, mix together the buttermilk, pureed fresh peaches, and vanilla, then set aside. Add the butter and sugar for the cakes to the bowl of the electric mixture and, using the paddle attachment, blend on medium speed until the mixture is pale and well-blended (approx. 2 minutes). Add the eggs, one at a time, mixing well after each addition. Mix in the freeze dried peaches. Mix in the flour mixture in three batches, alternating with two batches of the buttermilk mixture (i.e. flour, then buttermilk, then flour, then buttermilk, then flour, and then all of both mixtures will be incorporated). Mix until just blended, scraping the batter down the side of the bowl as needed. Scoop even amounts of batter into the cupcake tins and bake for 21-24 minutes, until golden brown (a toothpick inserted into the center of the cake should come out clean or slightly crumby). Remove from the oven and allow them to cool for about 10 minutes, then move them to a cooling rack to finish cooling completely.

For the frosting
Using the paddle attachment on the electric mixer, mix the butter until softened and pale in color. Add the cream cheese and beat to combine, then add the vanilla extract. Add the pulverized peaches and blend thoroughly. Add 3 cups of powdered sugar to the mixture and mix. Add more as desired, and mix until the frosting is creamy, thick, and spreadable.

Spread or pipe frosting onto each of the cupcakes. Garnish each with a dusting of pulverized, freeze-dried peaches or a slice of fresh peach. Can be kept at room temperature or in the fridge (I like to keep mine in the fridge because of the cream cheese and butter in the frosting).


These cupcakes are perfect for the summer time! Fresh and dried peaches offer light, sweet, and fruity flavor, while the cream cheese in the frosting creates a tangy, buttery taste that blends well with the sweetness of the cakes.

Tuesday, July 3, 2012

Hot, hot, hot!

I'm on my own for a few days, and so far, it's been like one long weekend—eating whenever I want (nothing like pancakes at noon and pasta after 7:00pm), staying up late watching movies on the basement's big screen, and sleeping in with the cats until 10 or 11 in the morning. Oh, and I've been actively avoiding the outdoors like the plague, rather than do my usual morning walk around the neighborhood (I've settled for Wii Zumba inside instead). This heat wave in the northeast is getting a little ridiculous. I've got the A/C cranked up high and all the lights off to keep the heat down, and the poor cats all look like rag dolls, sprawled out belly up on the back porch. Weather like this makes me want to drink tall glasses Kool-Aid, eat big bowls of fruit, and gorge on ice cream.

The other night, I did what I normally do when I'm on my own for dinner—I rummaged through the fridge, found a few good items, and threw together a meal-for-one. I'd just gotten some fontinella cheese on a whim during a recent trip to the grocery store and, despite the warm weather, a hot, cheesy, saucy pasta sounded delicious. Fontinella, a white, Italian cheese, has incredible flavor—it's like a mix of sharp cheddar, Swiss, Pecorino-Romano, and Parmigiano-Reggiano. That sharp, salty, nutty flavor paired perfectly with applewood smoked bacon and fresh basil, so I had myself quite a nice dinner. Sadly, no recipe follows, as I measured nothing as I cooked and only made a one-person portion, but I wanted to share, because, well, because I can. I'll be posting two new recipes either tonight or Wednesday morning, so stay tuned for some posts with some summery treats, and try to stay cool in the meantime!

Pasta with Bacon and Basil in a Fontinella Cheese Sauce