Friday, April 27, 2012

Recipe: Homemade Slice-and-Bake Cookies (a.k.a. Ice Box Cookies)

For most colleges and graduate schools, it's final exam time, which means there are countless 20-somethings, my boyfriend included, stressing out, staying up late, and eating junk food just to make it through. I thought it would be fun to send a care package to John with some homemade cookies and other goodies to make his law school exam studying a little less awful, and I decided to try out a cookie recipe from one of my recent Bake 1 classes. Ice Box cookies, are they are officially called, are essentially homemade slice-and-bake cookies, called "ice box cookies" because the dough can be made up and then stored in the fridge (or "ice box"), and cookies can then be sliced off one at a time and baked fresh rather than be baked all in one batch. They're very easy to make, and you can dress them up by dying and rolling/shaping the dough into a variety of patterns, including the pinwheel (which I made for John) and checkerboard.


Yields: Approx. 3 dozen cookies (depends on how thin you slice them)
Prep. time: 10 minutes, plus time to chill the dough
Baking time: 12-15 minutes
Difficulty: Easy to Moderate (rolling into shapes takes a little skill)
Special equipment: Rolling pin

Ingredients

  • 2 sticks (or 8 oz.) unsalted butter, softened
  • 3/4 cup granulated sugar
  • 1/2 cup powdered sugar
  • 2 large egg yolks
  • 2 tsp. vanilla extract
  • 2 & 1/4 cup all-purpose flour
  • 1/2 tsp. salt
  • Food coloring of your choice

Directions
In the bowl of an electric/stand mixer, cream together the two types of sugar and butter (cream together: using the paddle attachment, blend on low to medium-low speed until the sugar and butter are well-blended; a few small lumps are okay). Add the egg yolks and vanilla and blend on medium-low speed until incorporated. Slowly add in the flour, a little bit at a time, until it is all blended into the dough and the dough is slightly sticky, soft, and pale yellow/khaki in color. 
To create a solid-colored dough: Add the food coloring of your choice to the dough and gently knead it into the dough until the dough is completely colored. Wrap the dough up in saran wrap or put in a bowl covered over with saran wrap and chill in the fridge for 10 minutes to firm it up. Remove from the fridge and roll into a large log, then return and chill until it's able to be cleanly sliced through (about 1-2 hours, or 10 minutes in the freezer). 
To create a pinwheel pattern: Divide the dough into two even pieces (it's easiest to weigh each piece on a kitchen scale so that you get equal pieces). You can dye one or both pieces (obviously, use two different colors if you choose to dye both). Gently knead food coloring into one or both dough balls until the dough is completely colored. Wrap the dough balls up separately in saran wrap or put in bowls covered over with saran wrap and chill in the fridge for 10-15 minutes to firm them up. Remove one dough ball and lay it out on a long piece of wax paper covered in a second sheet of wax paper. Tape down the wax paper sheets (just a small piece of tape along the top, bottom, and sides—packing tape holds really well), so they don't move around when you start to roll out the dough. With a rolling pin, roll the dough out into one long, wide sheet, then remove the tape tape from the wax paper and lay the dough on a sheet pan in the fridge to chill for at least an hour (or chill in the freezer for 5-10 minutes). Repeat this process with the other piece of dough. Once both pieces have been chilled, remove them from the fridge (1), remove the wax paper from on top of each (2 and 3) and flip one on top of the other as centered as possible (4). Trim the edges with a knife or pizza cutter (5) to create a straight-edged, even rectangle. The trimmings can be mushed together to create a tie-dye ball of dough that can also be rolled into a log and sliced up into cookies (see #6). Roll the rectangle into a log (you'll be able to see the pinwheel shape when you look at the ends of the log) and chill in the fridge for at least an hour (or freezer for 10 minutes). Either store it in the fridge and slice off cookies as needed, or slice the cooled log down into even slices (6) and get ready to bake. 
To bake them: Preheat the oven to 325*F. On a baking sheet covered with parchment paper, lay out the cookie slices with an inch or two of space in between each. Bake for 12-15 minutes until slightly crispy around the edges and cooked through in the middle, but still soft (they should not be very golden-brown at all though, because that means they're overdone). Remove from the oven, chill on the sheet pan, then remove to a wire rack to chill completely. Store in an airtight container (or eat a bunch right away, haha).
1

2
3

5

4


6 (this roll was made from the scraps of the pinwheel roll)

These cookies are buttery, sugary, and so much fun! They're a great thing to keep in the fridge if you have kids—you can always have fresh-baked cookies when they get home from school or when they want a snack to eat while they work on homework. They're also great as a simple dessert or easy bake sale item, and they hold up really well in the mail (so they're great for to send for Christmas or birthdays). They can be completely sliced up and baked all together too because they keep for days!


Monday, April 16, 2012

Recipe: Chicken, Broccoli, and Almond Stir-fry with Rice

During my grocery shopping trip yesterday, I decided to throw caution to the wind and just grab whatever caught my eye, rather than buy based on already picked out recipes. I bought asparagus, broccoli, quinoa, Parmigiano-Reggiano cheese, and roasted almonds, among other things, knowing that I could easily find ways to work them into dinners this week. Looking into the fridge and pantry tonight, I pulled out the newly purchased broccoli and roasted almonds, plus a handful of other ingredients, and whipped together a quick and easy stir fry that was so delicious.


Serves: 4
Prep. time: 10 minutes (plus a little extra time for the chicken to marinate)
Cooking time: Approx. 20 minutes for the rice, 10 minutes for the stir fry
Difficulty: Easy

Ingredients

  • 2 chicken breasts, cut into 1 inch wide and 2 inch long strips
  • 1 large bundle of broccoli (approx. 3 bunches, or 3-5 cups), cut into florets (or 1 large bag of frozen broccoli florets)
  • 2 cups dry white rice (plus any ingredients needed to cook it)
  • 1/2 - 2/3 cup whole roasted almonds, roughly chopped
  • 1 onion (or 1 bunch of green onions), sliced into thin rings
  • 1 clove garlic, minced
  • Peanut oil (enough to lightly coat the bottom of a pan)


Chicken marinade


  • 1 clove garlic, minced
  • 1/4 cup soy sauce
  • 2 tbsp. mirin or sherry
  • 1 tsp. oyster sauce
  • 1/2 tsp. grated ginger


Sauce


  • 1/4 cup soy sauce
  • 1/4 cup water
  • 1 tbsp. mirin or sherry
  • 2 tsp. oyster sauce
  • 1 tsp. honey
  • 1/2 tsp. grated ginger
  • 1 tbsp. cornstarch

Directions
Mix together the ingredients for the marinade in a small-to-medium bowl, then add in the chicken and stir to coat. Put the bowl in the fridge while you do your other prep. work. Bring a medium pot of lightly salted water to a boil and quickly cook (about 4 minutes) the broccoli, then drain it, and return it to the pot with cold water and ice to stop any residual cooking. Combine the ingredients for the sauce, whisk together, and set aside. Cook the rice according to package instructions (the brand I use calls for a little water, salt, and butter, and the rice cooks for about 20 minutes). During the last 10 minutes the rice is cooking, heat a little peanut oil in a large, deep skillet or a wok over medium-high heat. Add in the onion and garlic to the skillet and cook for just a minute or so, until the onion starts to brown slightly, then add in the chicken (try not to pour too much of the marinade in with it). Cook until the chicken is just barely cooked through, then toss in the almonds. Drain the broccoli, then add it to the skillet and stir everything to combine. Make sure the chicken is cooked through, but tender. Slowly pour in the sauce and cook until it's slightly thickened (2-5 minutes). Serve the finished stir-fry over rice.

This dish is flavorful and easy to prepare—perfect for weeknights or a casual weekend meal. The crunchy almonds are slightly softened in the heat and blend perfectly with fresh broccoli and tender chicken. The soy and oyster sauces in the stir fry sauce add a savory, salty-meaty taste ("umami"), while the sherry and honey add a touch of sweetness for balance. Fluffy white rice is the perfect thing to pull it all together.

Monday, April 9, 2012

Recipe: Lemon Chicken and Asparagus Pasta with a Creamy Goat Cheese Sauce

Yes, yes, I know...this sounds a whole lot like a recipe I shared just a little while ago, and really, it's kind of like that recipe, version 2.0. While that recipe was chicken-less and could be pulled together in less than 20 minutes, last night's meal had a little more going on: an actual sauce (as opposed to just straight, melted goat cheese with some seasoning), marinated chicken, and a little extra flavor.


Serves: 4
Prep. time: 15 minutes (plus at least 2 hours for the chicken to marinate)
Cooking time: 10-20 minutes
Difficulty: Easy

Ingredients

  • 2 chicken breasts, cut into 1 inch wide, 2 inch long slices
  • 8 oz. rotini, or other short pasta (penne, farfalle, or gemelli would work well)
  • 1/2 or a whole bunch of asparagus, cut into 2 inch pieces
  • 1/4 - 1/2 cup lemon-based marinade or dressing to use to marinate the chicken (I had a lemon-thyme dressing from a favorite restaurant in North Carolina, but you can use something from your local grocery store)* 
  • Olive oil, enough to lightly coat the bottom of a pan
For the sauce
  • 3/4 cup chicken broth or stock
  • 1 tbsp. extra virgin olive oil
  • 3 tbsp. white wine (cooking wine is fine)
  • 1-2 cloves garlic, minced
  • 1 tbsp. chives, finely chopped
  • Dried sage, to taste
  • Dried thyme, to taste
  • 1 tsp. lemon zest
  • Salt and pepper, to taste
  • 4-6 oz. soft goat cheese (buy a log of cheese rather than crumbles, because the log, when pulled apart, will melt better and faster)
  • 1/2 cup heavy cream
  • Cornstarch and water mixture to thicken, as needed
*If you don't have a marinade or dressing, whisk a teaspoon each of thyme, sage, salt, and pepper together with a few tablespoons each of extra virgin olive oil, lemon juice, and white wine to create a quick marinade from scratch.


Directions
Place sliced chicken into a medium bowl with store bought or homemade marinade/dressing and allow to marinate in the fridge for at least 2 hours (any less, and it just won't have a lot of flavor).
In a small pot over medium heat, whisk together the olive oil, chicken broth, and white wine and cook until reduced by about 1/2. Add in the garlic (if you want, you can lightly saute it first, then add it in), chives, lemon zest, and seasonings (thyme, sage, etc.). Crumble the goat cheese into the mixture and whisk it in until it's melted and combined. Slowly pour in the heavy cream, whisking constantly as you add it in. Season more as needed, then reduce heat to low. If the sauce seems thin, add a little cornstarch-and-water mixture to thicken it. In the meantime, bring a medium pot of salted water to a boil, then add the pasta and cook according to package instructions. When the pasta has about 5 minutes left, add the asparagus to the pot and cook the two together until the timer runs down. While the pasta and asparagus are cooking, heat a little olive oil in a large pan over medium-high heat, then add the chicken slices and cook until golden brown on both sides and cooked through. Season as needed. When the pasta and asparagus are done, drain and return to the pot, then toss the mixture with the finished goat cheese sauce. Add in the chicken, and toss to combine. Serve with a sprinkling of fresh basil or chives if desired.

This dish is light, fresh, and flavorful—perfect for a warm day or a quick weeknight meal. Lemon and goat cheese are a match made in heaven, and the addition of herbs and white wine help accentuate the flavors. Tender chicken and crisp asparagus add texture and flavor to the dish and help round it out.

Sunday, April 8, 2012

Recipe: White Chocolate Chip and Orange Zest Cookies

Looking to make something light and sweet for Easter (and having failed at making candied ginger for use in orange ginger cookies that I mentioned in a Facebook post a little while ago, but still having a craving for orange), I decided to try out these "Orange Creamsicle cookies" from Living Tastefully. I didn't have enough white chocolate chips for a full batch of cookies, so I halved the recipe, but I'll share the full batch recipe here since the taste is the same (delicious!).
These cookies combine the sweet, vanilla-like taste of white chocolate with the brightness of tangy-sweet orange zest to create the perfect flavor combination in a twist on the original chocolate chip cookie. Try dark chocolate chips for a richer flavor or try lime or lemon zest instead of orange for a subtle change in flavor.


Yields: About 3-4 dozen (I got 20 out of a half batch)
Prep. time: 10 minutes
Cooking time: 10-12 minutes
Difficulty: Easy

Ingredients 
  • 2 & 1/4 cup all-purpose flour
  • 1/2 tsp salt
  • 3/4 tsp. baking soda
  • 1 cup unsalted butter, softened
  • 1/2 cup granulated sugar
  • 1/2 cup brown sugar (pack the sugar into the cup rather than loosely fill)
  • 1 large egg
  • 1 tbsp. orange zest (grated orange peel)
  • Approx. 12 oz. white chocolate chips

Directions
Preheat the oven to 350*F. Combine the flour, salt, and baking soda in a bowl. In a mixer, blend/cream together the butter, sugar, and brown sugar on low to medium speed. Add in the egg and orange zest and beat on low to medium speed. Slowly add in the flour mixture and beat on medium speed until the mixture is well-blended and uniform in color. Add in white chocolate chips and beat gently or stir to mix them in. Roll out 1 & 1/2 - 2 inch balls of cookie dough and place them a few inched apart on ungreased baking sheets. Bake for 10-12 minutes, until lightly golden brown on top. Remove the baking sheets from the oven and allow the cookies to cool for a few minutes, then move the cookies to a rack to cool completely. Store in an airtight container. If cookies start to get hard, add a slice of bread to the container to help soften them.

These cookies are light, sweet, and citrus-y—perfect for the spring (and Easter day)! Enjoy with a cup of tea, a glass of milk, or alongside all of your Easter candy.

How to Roast Peppers

Roasting peppers is an incredibly quick and easy process that can come in handy when you don't have a jar of roasted peppers handy or when you're looking for something to do with some peppers you have laying around in your fridge. Roasting peppers enables you to remove the skin of the pepper and it softens the flesh of the pepper, all while creating a deep, warm flavor. Here's a quick step-by-step on how to roast peppers:

1. Move a rack in your oven to the highest part of the oven, closest to the broiler, then turn the broiler on.

2. Wash peppers (any sort of pepper is fine; the peppers in my pictures are bell peppers), cut off the tops/stem end, and remove the "pulp/membrane" and seeds from the inside.

3. Cut the peppers in half and lay them out, cut side down, on an ungreased baking sheet, then gently press down on the halves to lightly flatten them.

4. Place the baking sheet in the oven under the broiler and cook for 5-10 minutes until the skin has blistered and turned black/brown (don't overcook though). Rotate as needed to ensure even roasting.


5. Remove the peppers from the oven and immediately wrap them in foil, then set them aside for at least 15 minutes, or up to an hour—this helps soften the peppers.

6. Unwrap the peppers and gently peel off the skins. The skins should easily slide off and should be discarded once removed.

Peeled pepper is on the left and the skin is on the right

7. Use the roasted peppers for sauces, soups, or as part of a meal. They can be stored in an airtight container in the freezer or fridge.

I used this technique this afternoon to roast a half of a green and orange pepper in order to make a quick sauce for pasta and it worked out so well. While the peppers were resting in the foil, I had time to unload the dishwasher and gather the ingredients for the roasted pepper sauce, and even though I only let them rest for about 15 minutes, they were perfectly softened and they blended well into the sauce I made. Try this technique at home and use your roasted peppers for sauces, soups, as an appetizer (sliced and served on crostini or blended into a dip perhaps?), or slice them up and toss them into a pasta dish or add them to pizza. Roasting peppers is so easy and the peppers can be used in so many ways!

Wednesday, April 4, 2012

Recipe: Lobster Ravioli in a Vodka Cream Sauce

I got the chance to spend this past week with Sara, my best friend from college—she found a reasonably-priced flight and flew up to my home in Pennsylvania for a visit. We spent time in Pittsburgh, visiting museums and eating some fantastic meals, and we also spent time at home, watching movies (including a guilty pleasure, You've Got Mail with Meg Ryan and Tom Hanks) and even doing a little cooking. I showed her some basics, like mincing garlic and cutting basil in chiffonade, and hopefully didn't drive her nuts by hovering over her while she performed said basics. One thing she said she really wanted to try was making homemade pasta with my pasta rolling machine, so I got the bright idea to make ravioli, because that's the one attachment (for raviolini, actually) on the pasta machine that I hadn't tried out yet. That idea turned into Lobster Ravioli in a Vodka Cream Sauce (with a little inspiration from here and here) that took at least three hours to make and resulted in some not-so-attractive but oh-so-tasty raviolini (basically, miniature ravioli). Now, if you want to go the easy route, buy pre-made lobster ravioli and skip ahead to the vodka cream sauce part of the recipe. If you want to go for the glory and make the ravioli by hand, I recommend looking up methods for cutting them by hand, because I've tried that way before and I'm betting it's a lot faster and less messy than the machine (though, keep in mind, this was our first time using this attachment, so it was bound to take a little longer than if I'd tried to do it before).

By the time we finally finished cooking, I was too hungry to go find my "plating" plate, so the "Poppies in Blue" will have to do


Serves: 4-6 (depends on the size and amount of ravioli/raviolini)
Prep. time: 10 minutes for the sauce; anywhere from 1-3 hours to make the ravioli (dough comes together in 10 minutes, and 30 minutes to rest, then the ravioli will take at least an hour to roll out and form)
Cooking time: 15-20 minutes for the sauce; 5 minutes for each batch of ravioli
Difficulty: Moderate

Ingredients
For the sauce
  • Extra virgin olive oil, enough to lightly coat the bottom of a pan
  • Approx. 1 tbsp. butter
  • 1-2 cloves garlic, minced
  • 1-2 shallots, minced
  • 1 cup vodka (you don't need to use the good stuff, since you're cooking it)
  • 1 cup chicken stock
  • 1 can crushed tomatoes (28-32 oz.)
  • 1/2 cup heavy cream
  • Fresh basil, chiffonade cut, to taste
  • Salt and pepper, to taste
  • Crushed red pepper flakes, to taste
  • Italian seasoning, to taste
For the ravioli
  • 1/2 stick (2 oz.) unsalted butter
  • 1 clove garlic, minced
  • 1 tbsp. shallots, minced
  • Approx. 16 oz. pre-cooked lobster meat (I used frozen, pre-cooked langostino lobster)
  • 4 oz. cooked crab meat (I used the crab meat you can find on the same shelf as canned tuna)
  • 2 oz. Cognac 
  • 1/2-1 cup ricotta cheese
  • 1 tbsp. chives, chopped
  • 2 tbsp. grated Parmesan cheese
  • Salt and pepper, to taste
  • Pasta dough, double batch, rested for 30 minutes (see recipe here; double the recipe)

Directions
Heat the butter for the ravioli in a large skillet over medium heat. Add the shallots and garlic and cook for a few minutes, until fragrant. Add the lobster, crab meat, and chives and cook for a few minutes, then add the Cognac and cook until it's been reduced by about 1/2 to 3/4 (you only want a little liquid in the pan). Pour the mixture into a food processor and pulse to chop the mixture (only pulse a few times—you just want to break up the pieces of lobster, but you don't want to turn the mixture into a puree). Pour the mixture back into the bowl and set aside to cool. Once cool, add in the desired amount of ricotta and season with salt and pepper. Now, the tricky part...if you're using a pasta machine with a ravioli attachment, follow the instructions for use (it'll likely involve threading dough into the attachment, adding filling, rolling out sheets of ravioli, then pulling apart the ravioli sheets into squares). If you're cutting them by hand, look up instructions (they'll likely say to lay out rolled-out dough on a flat surface, place a dollop of filling a few inches apart in straight lines down the dough, then lay a sheet of dough on top, press around each filling mound, and cut into ravioli shapes). Either way, you will need to make sure you have large, rolled out pieces of dough before you start forming and cutting. (I apologize for not offering more information, but I was using a machine and followed its instructions to make my ravioli). Once the ravioli are formed and cut, spread them out on a lightly floured baking sheet and cover with a clean towel to keep them from getting dried out.
In a large, deep pan, heat the olive oil and butter for the vodka sauce over medium heat. Add in garlic and shallots and cook for a few minutes, until lightly fragrant. Add the vodka and cook until it's been reduced by half, then add the chicken stock and tomatoes. Turn up the heat and cook until it just starts to boil, then reduce heat to low. Slowly whisk in the heavy cream, and continue to keep the sauce warm.
Bring salted water to a boil in a large pot. Cook the ravioli in batches, for 5 minutes each. Rather than drain the pot, refill, and wait for it to boil all over again, just pull the ravioli out with a slotted spoon and continue to use the same batch of boiling water. Transfer the cooked ravioli from the spoon into the sauce. Once all of the ravioli is cooked and added to the sauce, it's finished. Serve with grated Italian cheese and a sprinkling of fresh basil.

Despite being labor-intensive (if you make the ravioli from scratch), this really is a delicious and surprisingly light dish. The ravioli are flavorful little pouches of meaty lobster and creamy ricotta and the vodka sauce, with the fresh taste of tomatoes and just a hint of the vodka, is the perfect choice for the pasta.

Monday, April 2, 2012

Recipe: Oreo-Stuffed Chocolate Chip Cookies

I first saw Oreo-stuffed chocolate chip cookies while perusing pins on Pinterest and I quickly pinned it to my own "Recipes to Try" board. I pulled that recipe out on Friday, having decided to make these crazy, monstrous cookies for my boyfriend as part of an Easter candy care package I had planned to send him. I didn't have enough flour to make a full batch, but the twelve cookies I got out of a half batch were more than enough to feed the two of us—these cookies are so big! As far as I can tell, you can use any chocolate chip cookie recipe (I usually use the Nestle Toll House cookie recipe), but I stuck close to the recipe I found on Sprinkle Charms, the site I pinned the recipe from, and they were absolutely delicious.


Yields: Approx. 24 cookies
Prep. time: 10 minutes
Cooking time: 10-15 minutes
Difficulty: Easy
Special equipment: Mixer

Ingredients

  • 1 cup (2 sticks) butter, softened (used salted, unsalted, or one of each)
  • 3/4 cup brown sugar
  • 1 cup granulated sugar
  • 2 eggs
  • 1 tbsp. vanilla extract
  • 1 tsp. salt
  • 1 tsp. baking soda
  • 3&1/2 cups all-purpose flour
  • Approx. 1&1/2 to 2 cups chocolate chips (I used Ghirardelli semi-sweet chocolate chips —they're rich and delicious)
  • 1 package Oreos (you'll only need about 24)


Directions
Preheat the oven to 350*F. Add the butter, sugar, and brown sugar to the mixer's bowl and cream together. Once mixed, add the eggs and vanilla and mix until well-blended. Gradually add in the flour, salt, and baking soda and mix until well-blended. Add chocolate chips and mix on low or stir to incorporate them into the batter.
To wrap the Oreos in cookie dough, get a small scoop of cookie dough and form it evenly around an Oreo, being sure to make sure the Oreo is completely encased in dough. The finished product will look larger than a regular chocolate chip cookie, and that's okay. Repeat until all of the dough is gone. Place cookies on an ungreased cookie sheet, a few inches apart (I baked about 6-8 per sheet), and bake for 10-15 minutes, until the cookies are lightly golden brown. Remove from the oven, let cool on the pan for a few minutes, then move the cookies to cool racks to finish cooling.


Yum!

The heat from baking softens the Oreos just slightly, so you get these great slightly crunchy, slightly soft Oreos in the middle of the cookies and the flavors of each cookie blend perfectly. These cookies are quite big, so one will likely fill you up, and they're absolutely perfect with a tall glass of cold milk.

Sunday, April 1, 2012

Recipe: Rotini and Asparagus Tossed with Goat Cheese, Lemon, and Herbs

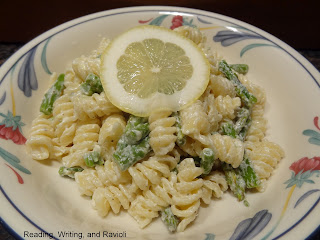
I came across a recipe for pasta with asparagus, goat cheese, and lemon a few months ago and took a look at it again this weekend. It called for only a handful of ingredients and just a few minutes of my time and it sounded like a delicious mix: perfect for a night at home on my own. The rich, tangy goat cheese, blended with lemon zest and seasonings, melts perfectly to coat the pasta and crispy asparagus—it's the perfect dish for a cool spring day or warm summer evening.

Not gonna lie...I totally forgot to use my nice solid white pasta bowl for the picture. Oh well.

Serves: 4-6
Prep. time: 10 minutes
Cooking time: 10-15 minutes
Difficulty: Easy

Ingredients

  • 1 lb. rotini (or other short pasta —farfalle, gemelli, or penne would work well)
  • 1 bunch of asparagus spears, washed, trimmed, and cut into 1-2 inch long pieces
  • Approx. 1/4 cup extra virgin olive oil
  • 1 tbsp. lemon zest
  • 1 tbsp. lemon juice
  • Approx. 5-8 oz. soft fresh goat cheese (by the log of cheese rather than crumbles for better melting)
  • 1 tbsp. dried sage
  • Garlic powder, to taste
  • Salt and pepper, to taste
  • Parmesan cheese, if desired


Directions
Bring a medium pot of lightly salted water to a boil. Add the pasta and cook according to the box instructions (approx. 7-10 minutes). During the last few minutes that the pasta is cooking, toss in the asparagus pieces so they cook too. In the meantime, add the olive oil, lemon zest and juice, goat cheese (pull it into pieces as you add it), sage, garlic powder, and salt and pepper to a large bowl and stir to combine. Once the pasta and asparagus have cooked, drain them, reserving about 1/4 cup of the pasta water, and toss the mixture in the bowl with the goat cheese mixture, adding the pasta water too. Toss until the goat cheese has even coated the pasta and asparagus. Serve with a sprinkling of Parmesan cheese, if desired.

This dish is fresh, creamy, and very flavorful. The goat cheese and lemon offer tangy flavors, while the salt and sage cut through the tang and create a deeper, richer flavor. To make this meal a little more well-rounded, served with grilled or seared chicken that's been seasoned with salt, pepper, and dried lemon peel.